A false ceiling looks beautiful only when it is executed professionally. Many ceiling failures (cracks, sagging panels, uneven lines, poor finishing) happen due to incorrect installation practices. ThatŌĆÖs why understanding the ceiling installation process is important ŌĆö especially if youŌĆÖre planning gypsum or POP ceiling work in Bhopal.
At CeilFab, we follow a structured ceiling execution method that ensures durability, clean lines, correct leveling, and long-term crack-free finishing. If you are planning complete project execution, explore: False Ceiling Services in Bhopal.
Step 1: Site inspection + measurement
Before installation starts, a professional contractor visits the site to check:
- slab condition and height
- room layout and furniture plan
- lighting requirements
- fan points and AC points
Tip: Ceiling should always be planned after furniture layout, not before.
Step 2: Level marking (most important for finishing)
Ceiling level is marked using laser levels and chalk lines. Incorrect marking leads to uneven ceiling finish and lighting mismatch. This step ensures:
- straight edges
- balanced drop height
- symmetry of grooves and cut patterns
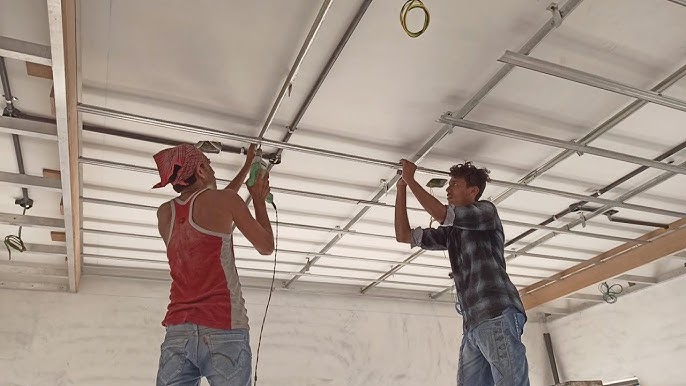
Step 3: Framework installation (GI framework)
This is the backbone of ceiling strength. We use GI framework that ensures:
- proper spacing of channels
- strong hanging rods
- correct anchor fixing
- anti-sagging structure
Framework quality decides ceiling life. Weak framework is the #1 reason for ceiling issues later. For professional execution, see: Ceiling Contractor in Bhopal.
Step 4: Electrical & lighting planning
Before gypsum board fixing, all wiring is planned:
- spotlight wiring
- cove light wiring
- profile light channels
- fan regulator lines
- AC indoor unit coordination
Explore ceiling lighting integration: Lighting Integration.
Step 5: Board fixing / panel fixing
Gypsum boards are fixed using correct screws and spacing. Board alignment must be perfect to avoid uneven joints.
Step 6: Joint treatment (crack prevention step)
Joint cracks happen if this step is not done properly. We use:
- joint tape
- jointing compound
- smooth sanding
Step 7: Putty + surface finishing
After jointing, putty is applied to smoothen the surface and make it paint-ready.
Step 8: Final inspection + paint handover
Before handover, we check:
- level accuracy
- lighting point alignment
- crack-free joints
- edge finishing
Common installation mistakes to avoid
- cheap framework
- no lighting plan before board fixing
- poor jointing and sanding
- not coordinating with AC/electrician
FAQs ŌĆō Ceiling installation process
How long does false ceiling installation take?
Single room: 2ŌĆō3 days. Full home depends on design. Read more: False Ceiling Installation Time.
Is gypsum ceiling better than POP ceiling for installation?
Gypsum is faster, cleaner and easier for modern lighting integration.
How to get accurate quotation?
The best way is site inspection and design discussion. Contact us: CeilFab Contact Page.
Conclusion
A false ceiling project is successful when executed with correct process, strong framework, proper lighting planning and finishing. For premium false ceiling execution in Bhopal, explore our services or request inspection through contact page.